Changing your home’s water filter is a vital task for maintaining clean, healthy drinking water, yet it often comes with the dreaded anticipation of leaks, spills, and a general watery mess. Many homeowners postpone this essential maintenance, fearing a soggy struggle. But what if you could approach your next filter replacement with confidence, knowing how to keep your floors dry and your system running smoothly? This comprehensive guide will equip you with the expert knowledge and practical steps needed to change your water filter cleanly and efficiently, ensuring pure water without the mess.
Understanding Your Water Filter System
Before diving into the mechanics of a filter change, it’s helpful to understand the different types of water filtration systems commonly found in homes. Knowing your system’s specifics can prevent surprises and streamline the replacement process.
Common types include:
- Whole-House Water Filters: Installed at the main water line entry, these filters treat all water entering your home. They typically feature large housings that require a wrench for removal.
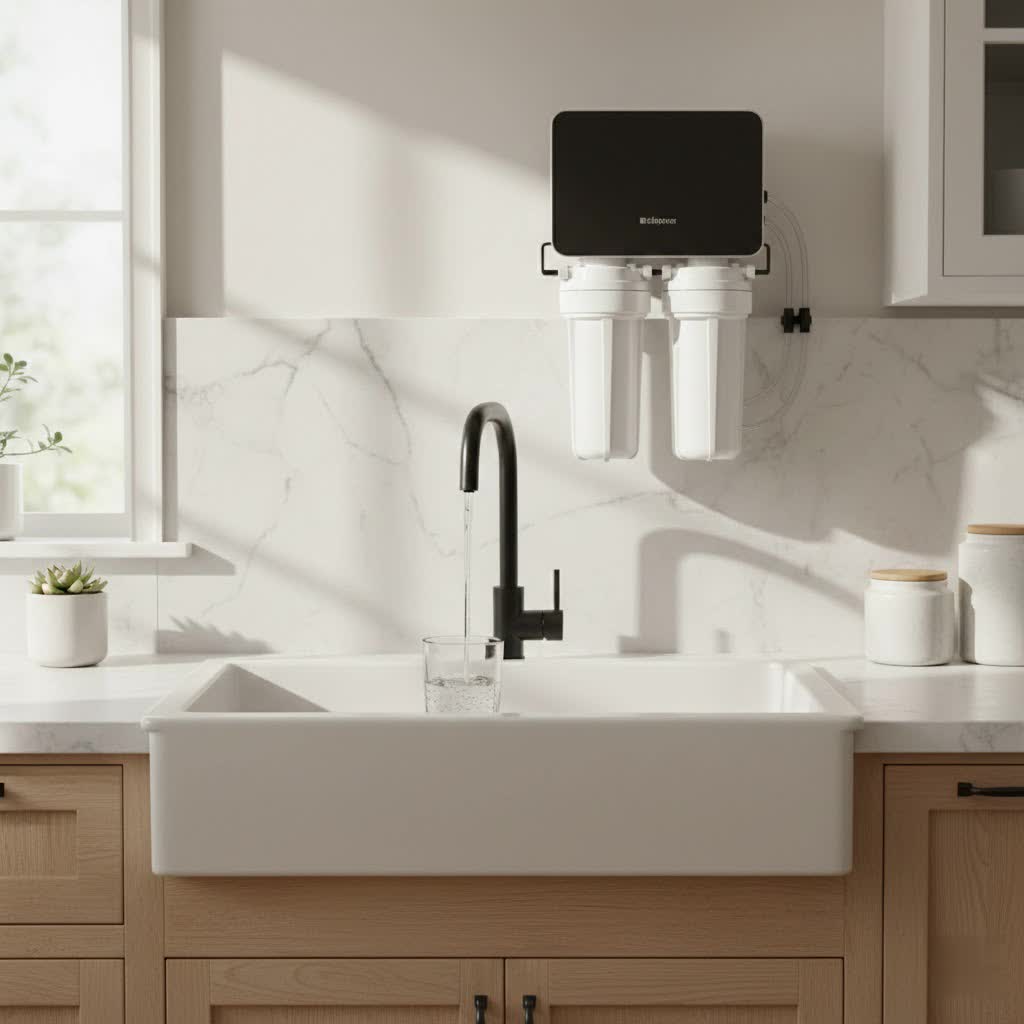
- Under-Sink Water Filters: These systems provide filtered water to a specific faucet, often located in the kitchen. They vary from compact single-cartridge units to multi-stage systems with several smaller filters.
- Refrigerator Water Filters: Integrated directly into your refrigerator, these filters provide clean water and ice. Their replacement methods can range from simple twist-and-lock mechanisms to push-in cartridges.
Regardless of the type, regular filter replacement is crucial. Over time, filters accumulate impurities, reducing their effectiveness and potentially slowing water flow. A neglected filter can even become a breeding ground for bacteria, defeating its purpose. By mastering a mess-free change, you ensure your family consistently enjoys the purest possible water.
Essential Tools and Preparations for a Mess-Free Filter Change
The secret to a clean water filter change lies in thorough preparation. Gathering the right tools and taking a few preliminary steps will prevent spills and make the process significantly smoother.
Here’s what you’ll need:
- New Filter Cartridge: Ensure it’s the correct size and type for your system.
- Bucket and Towels/Rags: Essential for catching drips and cleaning up any unexpected spills. A larger bucket is always better.
- Filter Housing Wrench: Most whole-house and some under-sink filters require a specific wrench, often included with the system. A strap wrench can be a universal alternative.
- Food-Grade Silicone Grease: Crucial for lubricating O-rings to create a watertight seal and prevent future leaks. Avoid petroleum-based lubricants as they can damage rubber O-rings.
- Safety Glasses: Protect your eyes from splashes, especially when dealing with pressurized systems.
- Gloves: Keep your hands clean, especially when handling old, dirty filters.
- Old Toothbrush or Small Brush: Useful for cleaning threads and tight spots inside the filter housing.
Pre-Change Checklist:
- Locate Your Water Shut-Off Valve: For whole-house systems, this is usually near your main water meter or pressure tank. For under-sink filters, there’s often a small shut-off valve on the cold water line leading to the filter. For refrigerators, locate the shut-off valve for the water supply line to the fridge, usually behind it or under the sink.
- Clear the Work Area: Remove anything that could be damaged by water. Lay down old towels or a tarp for extra protection.
- Depressurize the System: This is a critical step to prevent water from gushing out when you open the housing.
- Whole-House/Under-Sink: After turning off the main water supply, open a nearby cold water faucet (or a hot water faucet if changing a whole-house filter) and let it run until the water stops flowing or trickles to a halt. Some filter housings also have a red pressure-release button that you can press.
- Refrigerator: Dispense water from the fridge until the flow stops to relieve internal pressure.
Step-by-Step Guide to a Spill-Free Filter Replacement
With your tools ready and the system depressurized, you’re set for a mess-free filter change. The process varies slightly depending on your filter type.
For Whole-House Water Filters
|
Our Picks for the Best Water purifier in 2026
As an Amazon Associate I earn from qualifying purchases.
|
||
| Num | Product | Action |
|---|---|---|
| 1 | LifeStraw Personal Water Filter for Hiking, Camping, Travel, and Emergency Preparedness |

|
| 2 | PUR Plus Vertical Faucet-Mount Water Filtration System, Lead-Reducing Filter, Easy Installation, 100-Gallon Capacity, Compatible with External Aerators, Grey |
|
| 3 | PUR 30-Cup Countertop Water Filter Dispenser, 1 Genuine PUR Filter, 2-in-1 Powerful Filtration, Lasts 2 Months or 40 Gallons, Dishwasher Safe, White/Blue (DS1800Z) |
|
| 4 | Bluevua RO100ROPOT Countertop Reverse Osmosis Water Filter System, Portable RO Filtration with Remineralization, No Installation, WQA Certified - ROPOT-UV, 6-Stage RO |
|
| 5 | Brita Metro Water Filter Pitcher with SmartLight Change Indicator, BPA-Free, Replaces 1,800 Plastic Water Bottles a Year, Lasts Two Months, Includes 1 Filter, Small - 6-Cup Capacity, White |
|
| 6 |
|
|
| 7 | Brita Large Water Filter Pitcher for Tap and Drinking Water, Includes 1 Standard Filter, BPA-Free, Lasts Two Months, 10-Cup Capacity, Bright White |
|
| 8 | Brita 27 Cup Water Filter Dispenser with Elite Filter, NSF Certified to Remove 99% of Lead, Reduces 30 Contaminants Including Microplastics, Mercury & Chlorine, SmartLight Indicator, BPA-Free, Black |
|
| 9 | Brita UltraMax Large Water Dispenser with Standard Filter, BPA-Free, Reduces Copper, Cadmium and Mercury Impurities, Lasts 2 Months or 40 Gallons, 27-Cup |
|
| 10 | Waterdrop G3P600 Reverse Osmosis System, 8 Stage Tankless Reverse Osmosis Water Filter, NSF/ANSI 42 & 53 & 58 & 372 Certified, Under Sink RO System, 2:1 Pure to Drain, Smart LED Faucet |
|
Whole-house filters often handle a large volume of water, making careful execution key.
- Turn Off Water Supply: Locate the main shut-off valve for your home and turn it off. If your system has a bypass valve, engage it to isolate the filter.
- Relieve Pressure: Open a cold water faucet on the lowest level of your home and let it run until water stops flowing. If your filter housing has a red pressure-release button, press and hold it until the water stops dripping.
- Position Bucket: Place a large bucket directly underneath the filter housing to catch any residual water.
- Unscrew Housing: Use your filter housing wrench to turn the housing counter-clockwise. It might be stiff initially. If it’s very stubborn, a gentle tap around the threads with a rubber mallet can help loosen it.
- Remove Old Filter and Empty: Carefully lower the housing, keeping it level to minimize spills, and remove the old, dirty filter. Empty any water from the housing into the bucket.
- Clean Housing and O-Ring: Thoroughly clean the inside of the housing with soapy water and a clean rag, paying close attention to the threads. Inspect the O-ring (a large rubber gasket) for cracks, stretching, or damage. If damaged, replace it. Remove the O-ring, clean its groove, and apply a thin, even layer of food-grade silicone grease. Reinsert the O-ring properly into its groove.
- Insert New Filter: Unwrap the new filter and carefully insert it into the housing, ensuring it sits correctly at the bottom.
- Reattach Housing: Screw the housing back onto the filter head by hand until it’s snug. Then, use the filter wrench for a final gentle snug—about an eighth of a turn—to ensure a tight seal without overtightening. Overtightening can damage the O-ring or housing.
- Restore Water Slowly: Slowly open the main water shut-off valve (or disengage the bypass valve). Listen as the housing fills with water. Watch for any immediate leaks around the housing. If no leaks, gradually open the valve fully.
- Flush the System: Open a cold water faucet and let the water run for several minutes (at least 3-4 gallons) until any cloudy water or air bubbles disappear and the water runs clear.
For Under-Sink Water Filters
These are typically smaller but also require attention to detail.
- Shut Off Water: Locate the cold water supply valve under the sink and turn it off. Open the filtered water faucet to relieve pressure.
- Access Filters: Depending on your model, you may need to disconnect tubing or unscrew individual filter cartridges.
- Remove Old Filters: Place a small container or towel under the filter to catch drips. Remove old cartridges according to manufacturer instructions (e.g., twist, pull down).
- Clean and Prepare: Clean the housing or manifold where the filters connect. Inspect and lubricate any O-rings with food-grade silicone grease.
- Install New Filters: Insert the new cartridges, ensuring they are properly seated and locked into place.
- Restore Water: Slowly turn the cold water supply valve back on. Check for leaks around all connections.
- Flush: Run the filtered water faucet for 5-10 minutes to flush out air and carbon fines.
For Refrigerator Water Filters
These are often the easiest to change mess-free.
- Shut Off Water Supply to Fridge: This is usually a small valve behind the fridge or under the sink.
- Locate Filter: Common locations are inside the fridge compartment, in the base grille, or on the back of the appliance.
- Remove Old Filter: Depending on the model, you might twist and pull, or push a release button. Have a towel ready for minor drips.
- Install New Filter: Insert the new filter, aligning it according to the manufacturer’s instructions. Ensure it clicks or twists securely into place. [cite: 5_prevent]
- Restore Water & Flush: Turn the water supply back on. Dispense water from the fridge for 3-5 minutes (about 2-3 gallons) to clear air and activate the filter.
Advanced Tips for Preventing Leaks and Ensuring a Tight Seal
Even with careful execution, small drips can occur. These advanced tips focus on common leak points and how to preempt them.
The “Golden Rule” of O-Rings: Clean, Lubricated, and Properly Seated
The O-ring is your primary defense against leaks. A dry, dirty, or improperly seated O-ring is the most common cause of drips. Always remove, clean, lubricate with food-grade silicone grease, and then carefully reseat the O-ring during every filter change. [cite: 1, 2, 3, 4, 1_prevent, 2_prevent]
Avoiding Overtightening
While it might seem counterintuitive, overtightening the filter housing can actually cause leaks. It can pinch, stretch, or damage the O-ring, compromising its seal. Hand-tighten the housing, then give it a gentle snug with the wrench—just enough to feel secure, not to strain it. [cite: 1, 4, 5, 2_prevent, 4_prevent]
Using Plumber’s Tape for Threaded Connections
For filters with NPT (National Pipe Taper) threaded connections, a thin layer of plumber’s tape (Teflon tape) or liquid pipe dope sealant on the male threads can create a more secure seal. Wrap the tape clockwise around the threads 2-3 times before making the connection. [cite: 4_prevent]
Slow and Steady Repressurization
Rapidly turning the water back on can create a sudden surge of pressure that can dislodge the O-ring or other components, leading to leaks. Always open the water supply valve slowly, allowing the system to gradually fill and stabilize. This also helps push air out gently.
Post-Change Leak Check Protocol
After restoring water, don’t just walk away. Monitor the filter housing and all connections for at least 15-30 minutes for any signs of dripping. Even a slow drip needs attention. If you spot one, immediately turn off the water and investigate.
“A well-executed water filter change isn’t just about clean water; it’s about respecting your home and avoiding costly water damage. Preparation and proper O-ring care are paramount.” – Admin of ReviewUB.com, Water Filtration Expert
Troubleshooting Common Issues During Filter Changes
Even with the best preparation, you might encounter a few snags. Knowing how to troubleshoot these can save time and frustration.
What to Do If the Housing is Stuck
Old filter housings can sometimes be difficult to open due to mineral buildup. If your wrench isn’t working:
- Gentle Taps: Use a rubber mallet to gently tap around the circumference of the housing where it meets the head. This can help break the seal of any mineral deposits.
- Re-apply Pressure (Carefully): In rare cases, a very slight turn of the water supply on and off quickly can create a tiny pressure surge that helps unseat a stuck housing. Use extreme caution with this method.
Dealing with Minor Drips and Persistent Leaks
If you notice a leak after reassembling:
- Shut Off Water Immediately: Isolate the filter system or your main water supply.
- Depressurize: Release any remaining pressure.
- Re-inspect the O-Ring: This is the most common culprit. Remove the housing, take out the O-ring, re-clean it, re-lubricate it, and ensure it’s perfectly seated in its groove without any twists or pinches.
- Check for Debris: Look inside the housing and on the mating surfaces for any debris that might be preventing a good seal.
- Check for Cracks: Inspect the filter housing itself for any hairline cracks, which would necessitate replacing the housing.
- Tighten Connections: For threaded connections, ensure they are snug, using plumber’s tape if applicable, but avoid overtightening. [cite: 4_prevent]
Managing Air Bubbles and Cloudy Water After Replacement
It’s completely normal to experience air spurts, sputtering, or cloudy (milky) water from your faucets immediately after changing a water filter. This is simply air trapped in the lines and carbon fines from a new filter being flushed out.
- Continue Flushing: Keep running water through a faucet for several minutes until the water runs clear and smooth. This process might take longer for whole-house systems (5-10 minutes or more).
- Check for Persistent Cloudiness: If the cloudiness persists for more than an hour or two of intermittent use, or if it has a color other than milky white, it might indicate a different issue, and you should consult your filter manual or a professional.
Conclusion
Changing your water filter doesn’t have to be a messy, stressful ordeal. By understanding your system, gathering the right tools, and meticulously following the steps outlined, you can confidently replace your filters while keeping your home dry and your water supply pristine. The payoff is immense: cleaner, better-tasting water for your family and the satisfaction of a well-executed DIY task. Prioritizing consistent maintenance ensures your filtration system performs at its best, protecting your household’s health and well-being. So, what steps will you take to ensure your next water filter change is completely mess-free?
Frequently Asked Questions
How often should I change my water filter?
The frequency depends on your filter type, water quality, and manufacturer recommendations, typically every 3 to 12 months. Whole-house filters might be annually, while refrigerator filters are often every six months. Always check your specific filter’s guidelines, and consider changing it sooner if you notice a drop in water pressure or taste.
What kind of lubricant should I use for the O-ring?
Always use food-grade silicone grease (also called silicone lubricant) for your filter’s O-rings. It helps create a proper seal, prevents leaks, and makes future filter changes easier. Do not use petroleum-based products like Vaseline, as they can degrade rubber O-rings over time, leading to leaks.
What if my filter housing is stuck and won’t unscrew?
If your filter housing is stuck, first ensure the water supply is off and the system is depressurized. Then, try gently tapping around the housing threads with a rubber mallet to loosen any mineral buildup. Avoid excessive force, as it can damage the housing.
Why is my water filter still leaking after I replaced the cartridge?
Leaks after a filter change are commonly due to a misaligned, dirty, damaged, or unlubricated O-ring. Turn off the water, depressurize, remove the housing, re-inspect and properly seat the O-ring with silicone grease. Also, ensure the housing isn’t overtightened and check for any debris or cracks. [cite: 1_prevent, 2_prevent, 3_prevent]
Is it normal to see air or cloudy water after changing a filter?
Yes, it is normal to experience some air in the lines (sputtering) and cloudy or milky water immediately after changing a filter. This is caused by air being reintroduced into the system and harmless carbon fines from the new filter. Simply run water from a faucet for several minutes until it runs clear.